
Manage Smart Treasury
The Smart Treasury feature automates liquidity top-ups based on configurable thresholds and AI-powered forecasts derived from your treasury's historical data. This helps ensure your Layer1 Wallet always maintains sufficient balance to support trading and withdrawals—even during periods of volatility or high activity.
Roles: In order to use Smart treasury your user must have the role treasury:admin.
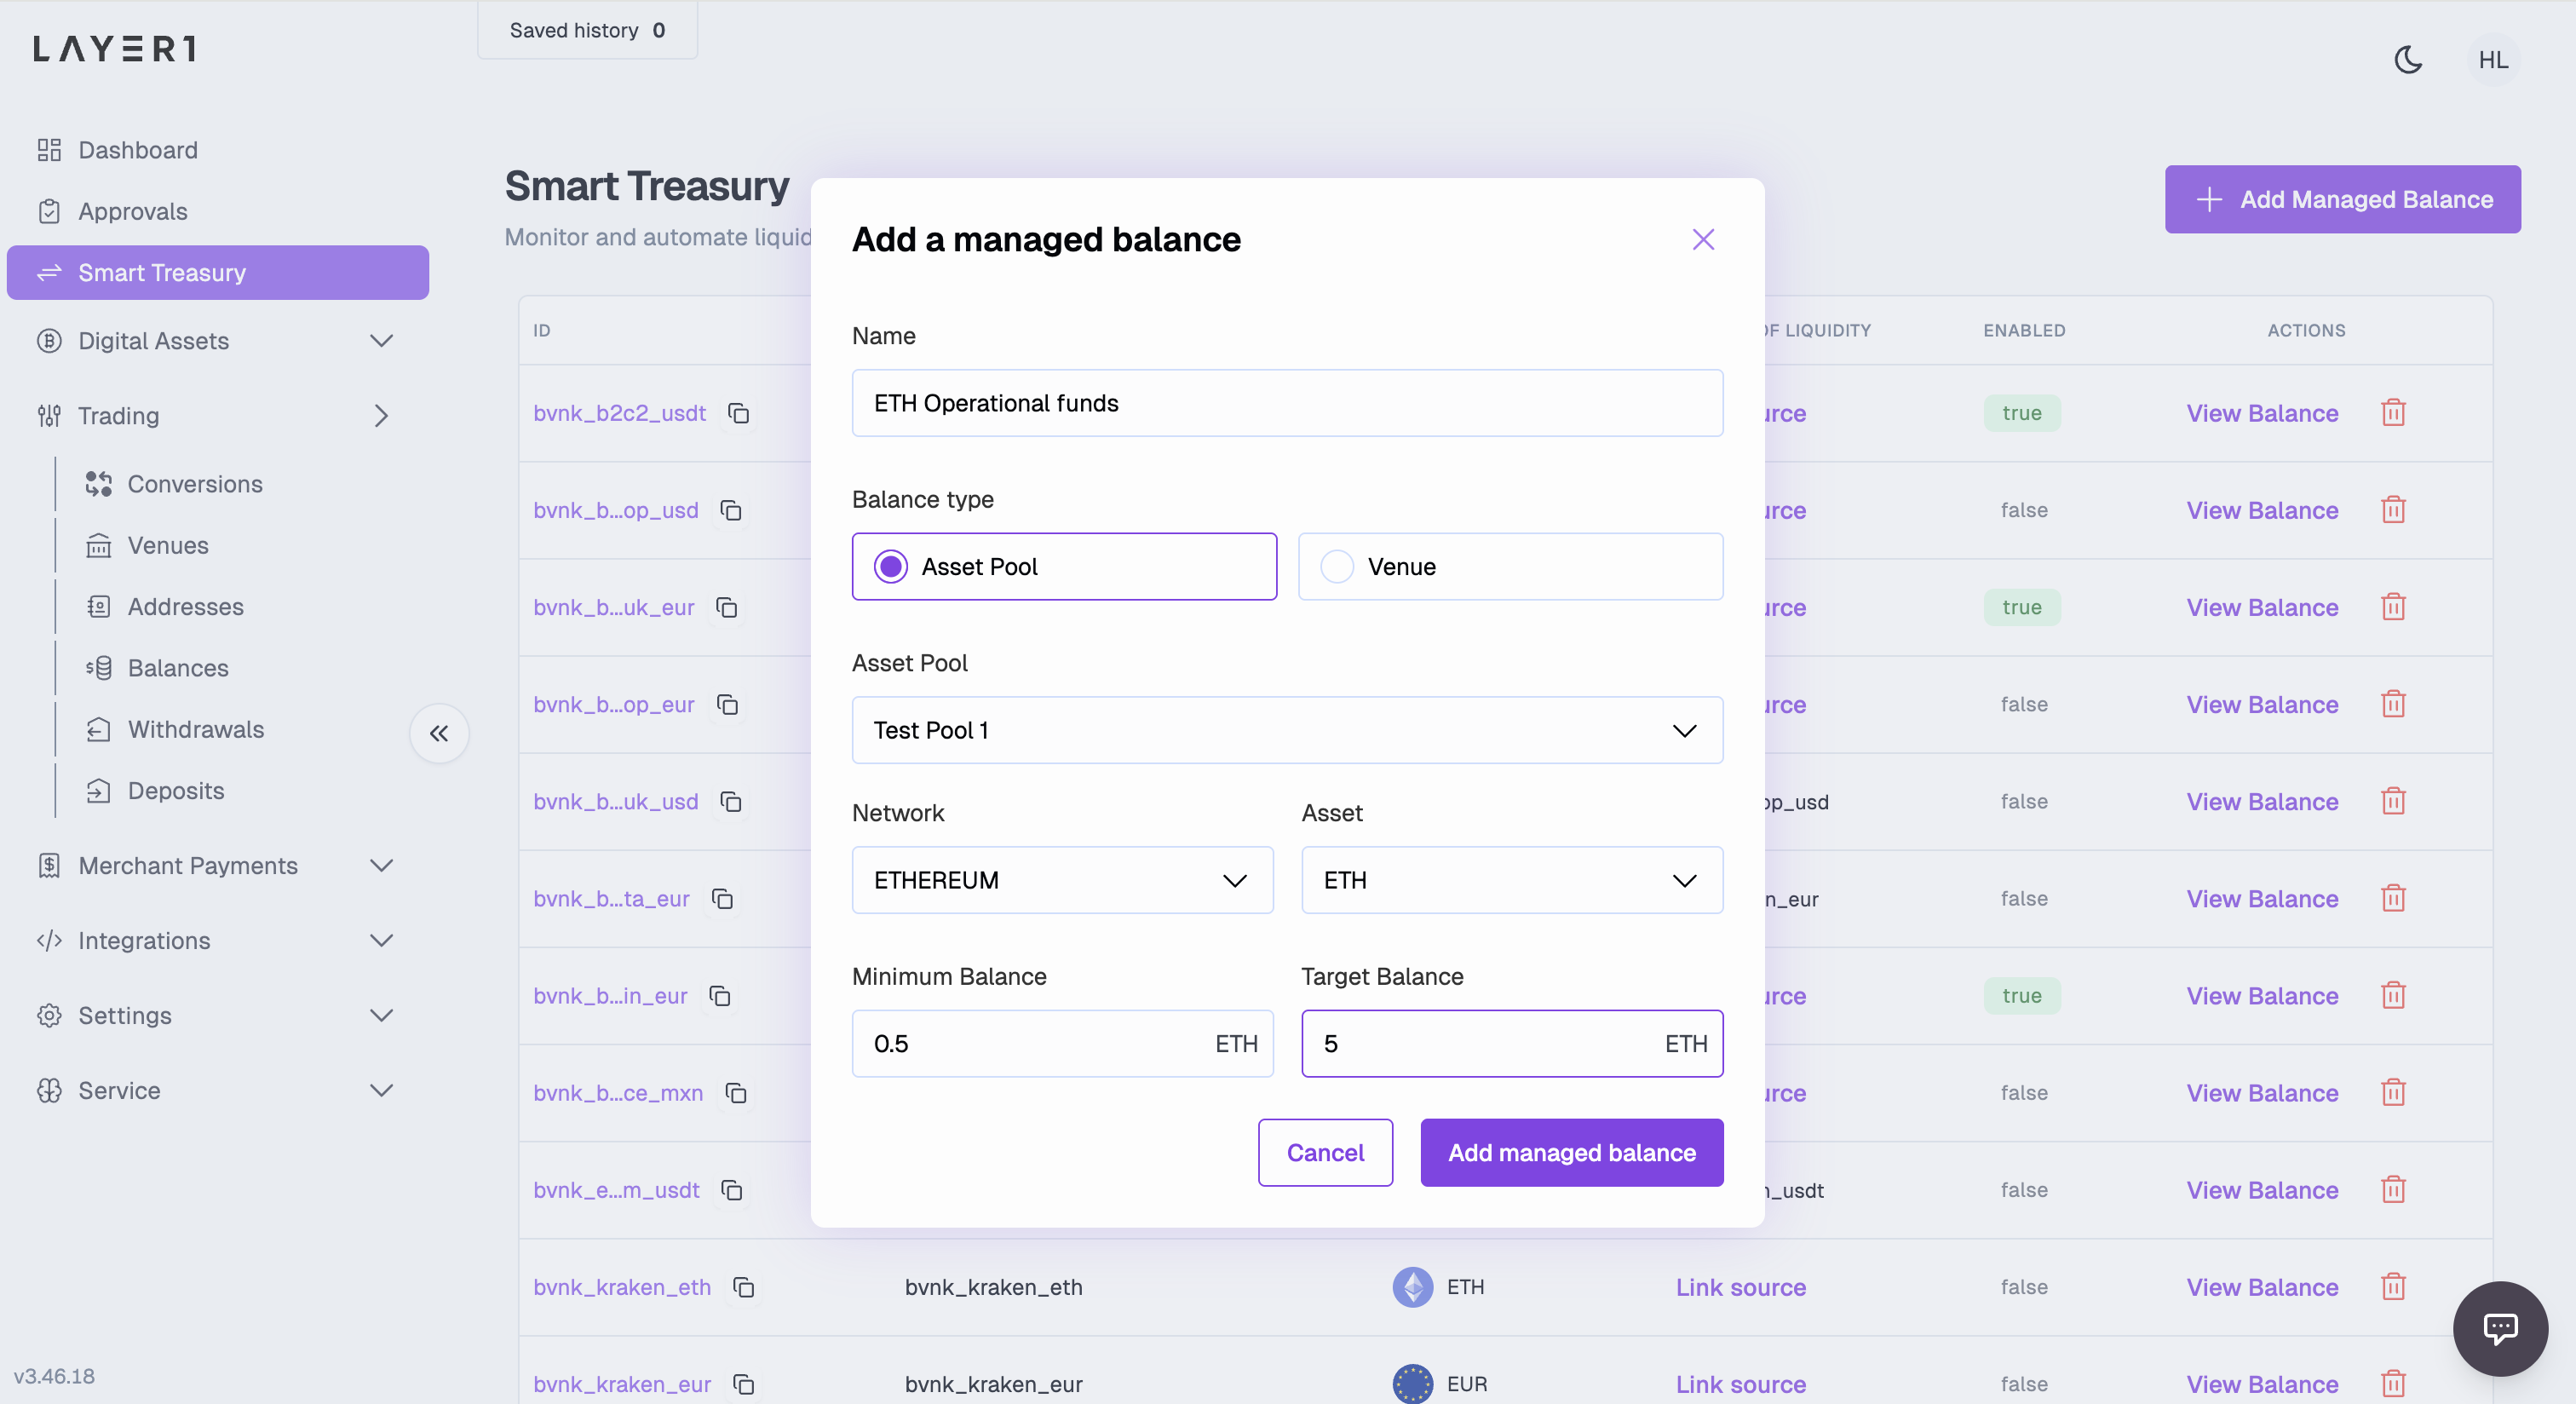
Add a managed balance
To add a managed balance, do the following:
-
On the Layer1 Portal, go to Smart treasury and click + Add Managed Balance.
-
Add a name for the managed balance you want to create.
-
Select the Balance type from the following:
- Asset Pool - a balance within your Layer1 Wallet
- Venue - a balance at a trading venue
-
Create a managed balance for:
Add the following details:
- Asset Pool: Select the existing Asset Pool.
- Network: select the required crypto network.
- Asset: Select the cryptocurrency you want to use.
- Minimum balance: Enter the minimum balance for the address. When the balance drops below the specified amount, a top-up can be initiated.
- Target balance: Enter the required amount for this address. When a top-up is initiated, this is the amount the address will be topped up to.
-
Click Add managed balance. Your managed balance appears in the table.
Add a liquidity source to a managed balance
Once you have created a managed balance, you need to link a source of liquidity to enable smart top-ups when the balance drops below the minimum.
To add a source of liquidity, do the following:
-
On the table row item to which you want to link a liquidity source, click Link source.
-
You can choose to add a new source or choose from existing sources.
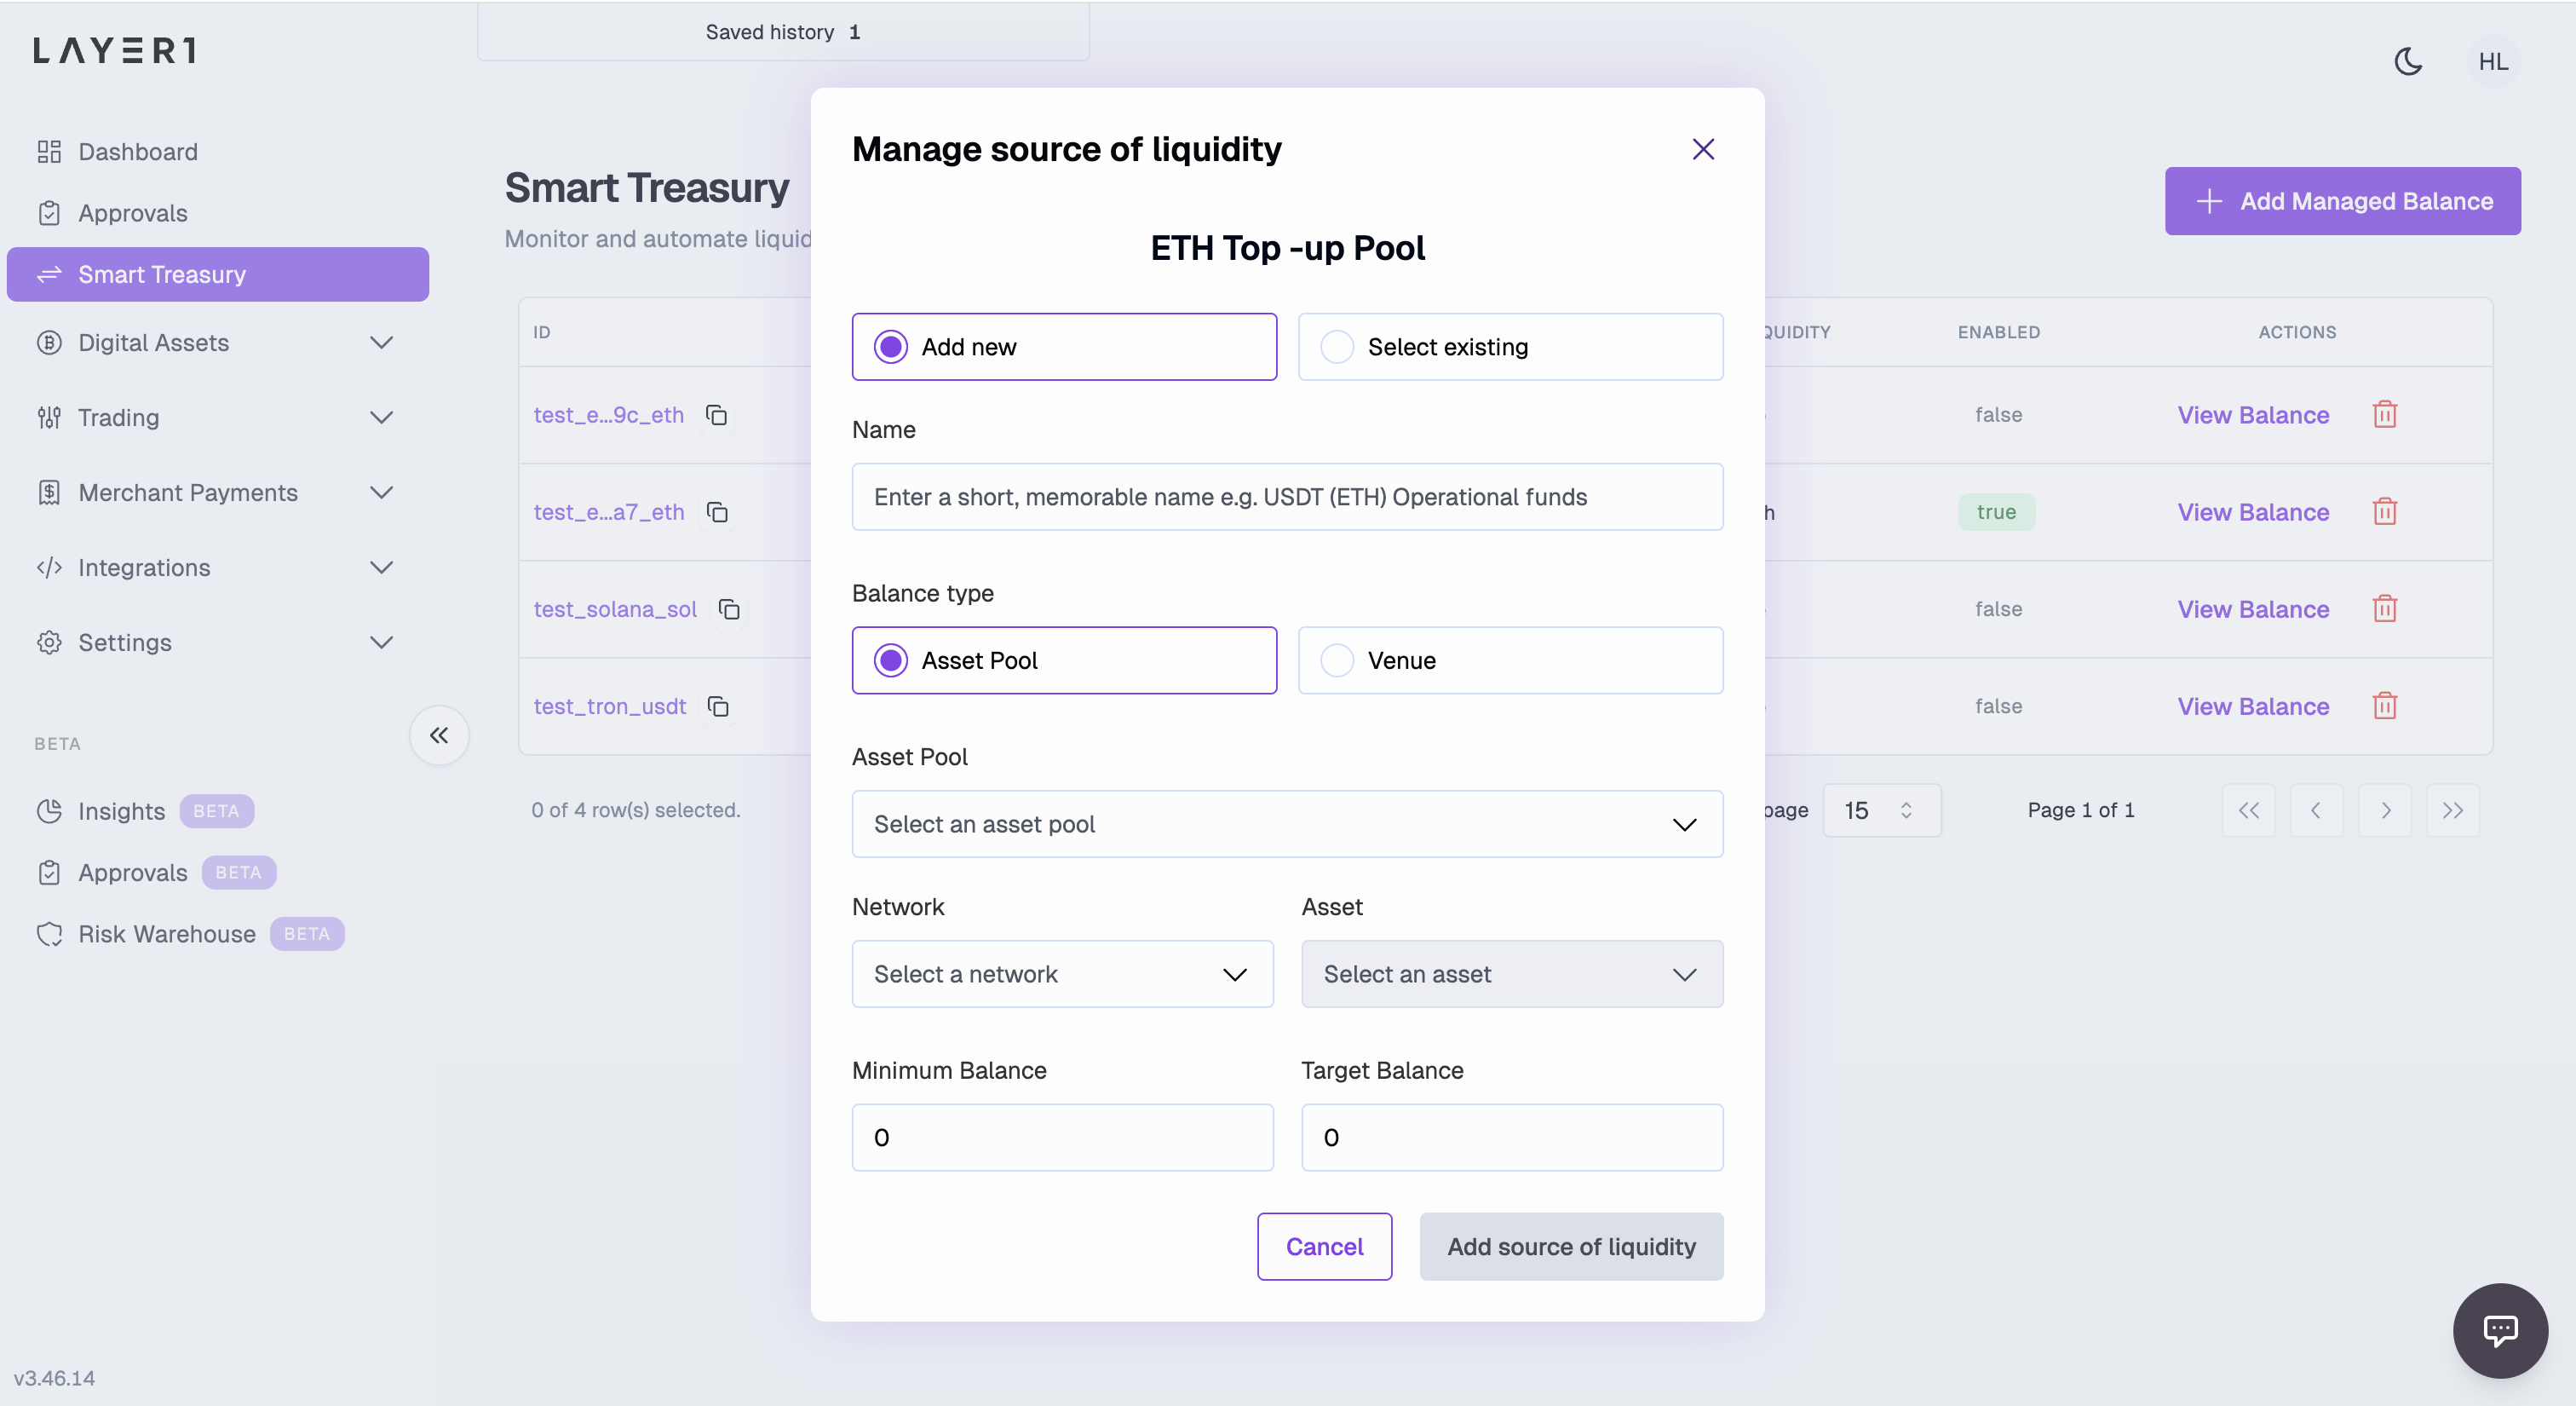
- To use an existing source, click Select existing and choose the required source from the dropdown.
- To add a new source, click Add new and complete the fields:
- Name: Specify the name for the liquidity source you want to create.
- Balance type: Select from the following:
-
Asset Pool: Balance within your Layer1 Wallet
-
Venue: Balance at a trading venue.
-
-
Complete the rest of the fields as described earlier and click Add source of liquidity to link the source to your managed balance.
When you link a source to a managed balance, the source will become enabled for top-ups and marked with a green tag in the Smart Treasury table.
Understand the Smart Treasury dashboard
Use the Smart Treasury dashboards to view top-ups and movements for a managed balance. To find the Smart Treasury dashboard, click View Balance next to the managed balance you want to view.
- Summary details: find information about the managed balance, such as the minimum and target balances, and the linked liquidity source
- Chart (Beta): view a visual representation of the address balance over time, including withdrawals and top-up events.
- Recent Liquidity Movements: view details of top-ups initiated by the Smart Treasury system for this address.
- Manage liquidity source: edit the liquidity source linked to the managed balance. You can remove an existing liquidity source and add a new one.
- Edit the managed balance: edit details of the managed balance, including name, minimum balance and target balance.
- Disable a managed balance: deactivate a managed balance, meaning auto top-ups will no longer be created for it. When you link a liquidity source to a managed balance, auto top-ups are automatically enabled.